1
Install the latest version of the HubSpot CLI
You’ll need the latest version of the HubSpot CLI to create an app. In a terminal window, run the following command to update your version of the CLI:
2
Authenticate your developer account
You’ll then need to authenticate your developer account by running the following command:
- Follow the prompts to generate a Personal Access Key in your account, then copy and paste it into the terminal to save your configuration.
- It’s recommended that you make this account your default by running the
hs account usecommand.
3
Create a new boilerplate project
Run the command below in your terminal to create a new project and marketplace app with either the currently compatible features or an app object reference schema. You’ll be prompted to provide a name and folder for the project.
4
Configure the top-level configuration of your newly created project
Apps created using version 2025.2 of the developer platform use source code files, typically defined as
<file-name>-hsmeta.json configuration files, to configure the various features of your project.App features are then created using a combination of subfolders from the main /src/app directory and other configuration files as needed. A full reference for your project structure can be found in the [app configuration] guide.To configure your project:- Add one or more valid redirect URLs to the
src/app/app-hsmeta.jsonfile based on your local (or another non-production) OAuth server configuration.
- Change the
uidproperty of the app in thesrc/app/app-hsmeta.jsonfile and the other*-hsmeta.jsonconfiguration files in your project.
a<appId>_<name>. For example, if your appId is 16858319 and your name property was CARS, then your FQN would be a16858319_cars.5
Configure the app object schema configuration
Next you’ll configure your app object schema:
- The configuration for your app object is defined within the
/src/app/app-objectsdirectory of your project. This directory is automatically included within the boilerplate project created by running thehs project createcommand above.
- Within the
/src/app/app-objectsdirectory, an exampleapp-object-hsmeta.jsonis defined as a starting point for configuring your actual app object schema. Open this file in your preferred editor, then update the schema accordingly:- Consult the app object component definition reference file and customize the fields to the corresponding values for your app object.
- You should use the object name granted to your app during the preview process as the prefix for the file name, followed by
-object-hsmeta.json. For example, if your app object name is “CAR”, the resulting configuration file should be namedcar-object-hsmeta.json. - Within the
configobject of your definition, thenamefield must match the name that was granted to your app during the review process, formatted inUPPER_SNAKE_CASEformat. - Note that once the properties and fields have been added to your app object schema and uploaded to your project in the next step, they cannot be removed.
- When you’re done editing your app object schema definition, and you’re ready to commit these changes, run the following commands to save your changes:
- In a browser window, navigate to
https://app.hubspot.com/developer_projects/<hubId>to visit the projects UI and confirm the app and project have been created, built, and deployed correctly.
6
Update your app scopes
Now that your app object schema has been uploaded, you’ll need to update the scopes defined in your
app-hsmeta.json file to reflect the scopes created from the previous step. These scopes should be visible in the CLI logs after you ran hs project upload.- Edit the
app-hsmeta.jsonfile and add the new scopes to the array ofrequiredScopeswithin theauthdefinition. For example, if yourappIdwasa12345, then you’d edit theauthdefinition to the following:
- When you’re done adding these scopes and you’ve saved your changes, run the following commands to commit your changes to the platform:
7
Add the client ID and client secret of your app to your app
After uploading your project, you’ll need to get the auth details for your app to copy over to your OAuth configuration:
- Click Projects in the Development navigation menu.
- Click the name of your new project.
- Click the UID of your app, then click the Auth tab.
- Copy the Client ID and Client secret from your new app and paste them into the corresponding locations in your local OAuth server’s configuration, then restart your OAuth server.
8
Create a developer test account (optional) and install your app
If don’t already have a test account, you can create one in HubSpot: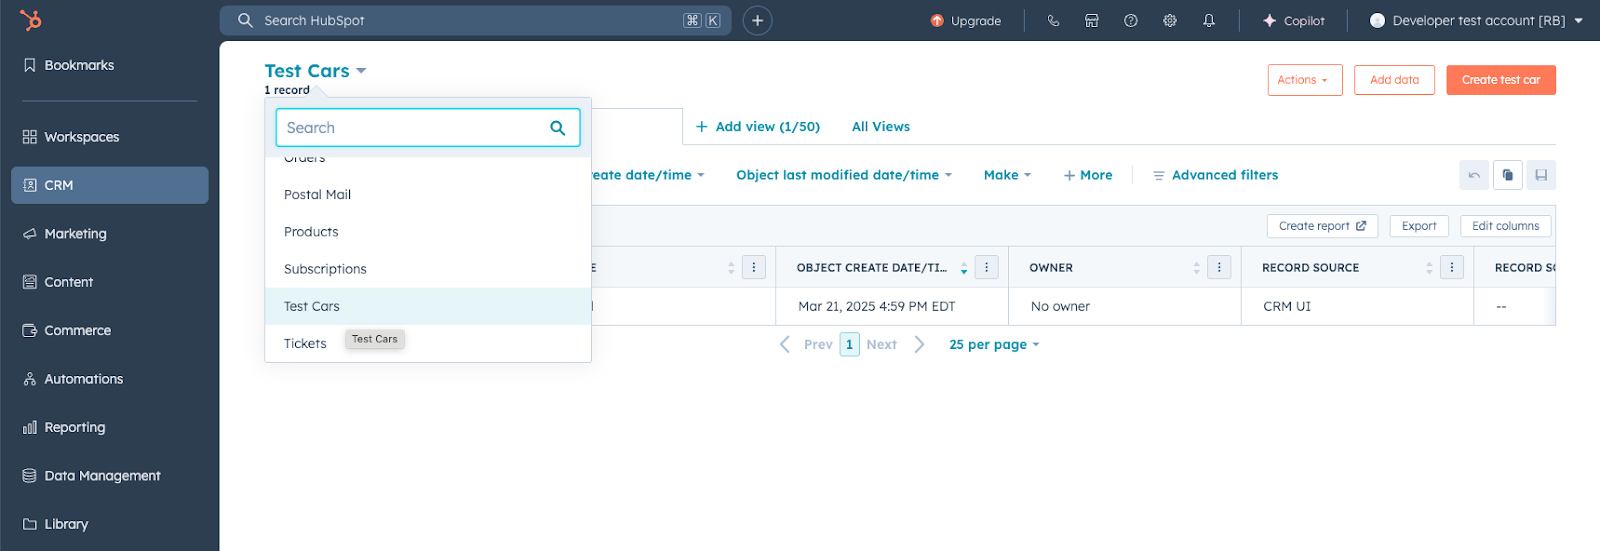
- Navigate to Test accounts in the Development navigation menu, then click Create developer test account. Follow the prompts to create your new test account.
- In the left sidebar menu, navigate to Projects, click the name of your new project, then click the UID of your app in the component list.
- On the Auth tab, copy your app’s install link.
- Use this link to install the app in your developer test account.
- Open the test account and navigate to the Connected Apps page, where you should see your installed app listed.
- In your test account, navigate to CRM > Contacts, then click the CRM object dropdown menu and confirm that your app object is available.
- You can then confirm that your schema definition conforms to your configuration file by creating a new record of your app object.
9
Programmatic data access using the HubSpot objects API
Now that you’ve successfully created your app object and you’ve tested it in a developer test account, you can use the OAuth access token associated with the installed test account to make requests to update data in the account directly via the objects API.Read through the objects API for more information on the API, but any requests specific to your app object will follow the same conventions as other standard objects in HubSpot. You’ll need to use your app object’s You can find the
objectTypeId or fullyQualifiedName as the objectType path parameter in your request.For example, the following code block demonstrates how to make cURL request to create a new record of your app object:objectTypeId for your app object by navigating to the records index page:- Navigate to CRM > Contacts in the developer test account that you installed your app.
- Click the dropdown menu at the top of the page and select your app object.
- The
objectTypeIdwill appear in the URL between the/objects/<objectTypeId>/viewsportion.