Prerequisites
- Because CMS React projects are developed locally, you’ll need to have the HubSpot CLI installed, along with Node v20.
- If you haven’t worked with CMS React projects before, it’s recommended to start with the quickstart guide.
Project structure
Your project structure will vary slightly based on whether your project includes a CMS theme or just React modules. Use the tabs below to view the basic project structure for theme or standalone React module development.- With theme
- Without theme
Below is the basic directory structure for a project with a CMS theme component on the latest version of the developer projects platform (
2025.2).If you’re familiar with building classic HubL themes locally, it may be helpful to think of this structure as having two parts:- The project-specific files and directories that enable you to build your theme on version
2025.2of the developer platform. This includes everything from the project root folder tosrc/theme/and the*-hsmeta.jsonfile. - The theme directory itself, which contains all of your theme assets and
theme.jsonconfiguration file. In the example structure below, this is themy-themedirectory.
Project schema
The*-hsmeta.json and .json schema requirements differ slightly based on whether your project includes a CMS theme or just React modules. Use the tabs below to view the basic project structure for theme or standalone React module development.
- With theme
- Without theme
The top-level configuration file for your project’s theme component is specified in the This file configures the unique identifier for the theme component, along with details such as the path of the main theme folder.
theme-hsmeta.json file in the src/theme/ directory.Building and deploying
Using project-specific CLI commands, you can build and deploy your project to HubSpot. Anhsproject.json file must be in the root directory of your project folder for the CLI to recognize your project.
To build and deploy your project, run hs project upload.
hs project deploy command.
View build and deploy history
In HubSpot, you can view your project’s build and deploy history as well as redeploy previous builds as needed. To view project builds and deploys:- Navigate to the project page in HubSpot:
- To open the project page from your terminal, run
hs project openfrom within the local project directory. - Alternatively, in your HubSpot account, navigate to Development. Then, click the name of your project.
- To open the project page from your terminal, run
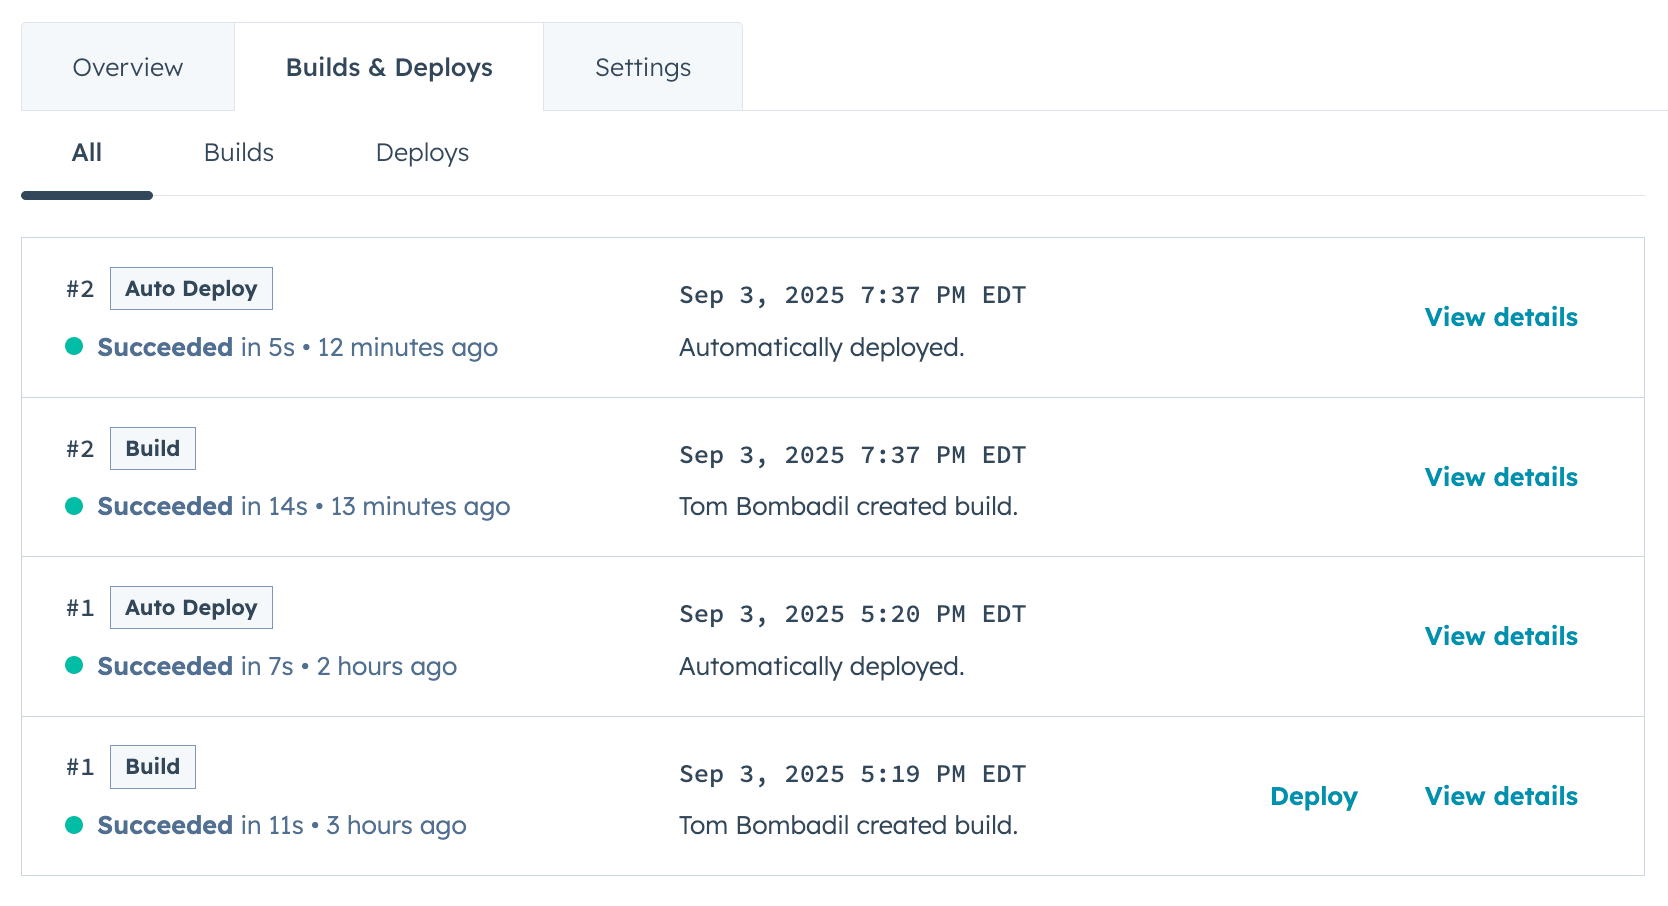
- On the Overview tab, you can view the most recent builds and deploys.
- Click the Builds & Deploys tab to view a full build and deploy history. To view more details about a particular build or deploy, click View details next to the build or deploy.
- Navigate to the project page in HubSpot:
- To open the project page from your terminal, run
hs project openfrom within the local project directory. - Alternatively, in your HubSpot account, navigate to Development. Then, click the name of your project.
- To open the project page from your terminal, run
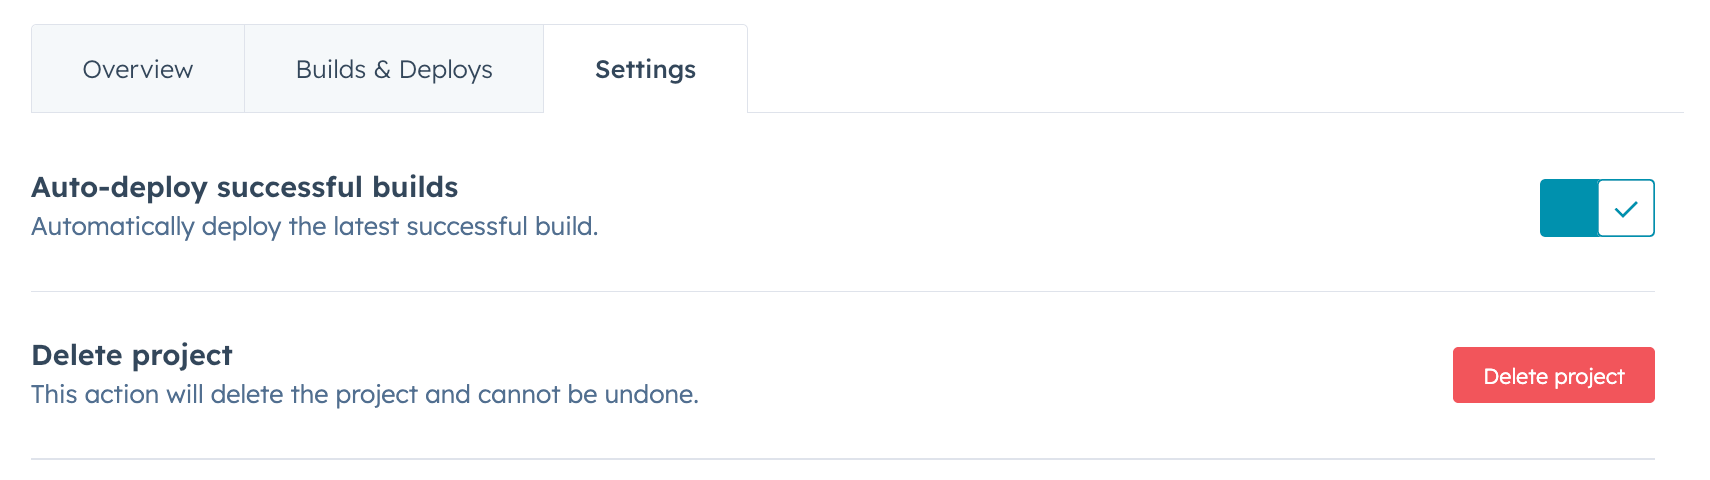
- Click the Settings tab, then toggle the Auto-deploy successful builds switch off.
Delete a project
To delete a project:- Navigate to the project page in HubSpot:
- To open the project page from your terminal, run
hs project openfrom within the local project directory. - Alternatively, in your HubSpot account, navigate to Development. Then, click the name of your project.
- To open the project page from your terminal, run
- On the project home page, click the Settings tab.
- At the bottom of the tab, click Delete.
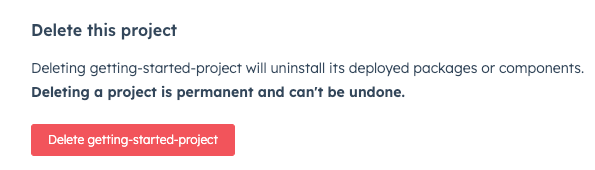
- In the dialog box, enter the project name, then click Delete project.