> ## Documentation Index
> Fetch the complete documentation index at: https://developers.hubspot.com/docs/llms.txt
> Use this file to discover all available pages before exploring further.
---
id: 5e5e3aaa-86d9-42ba-8882-e8c9fd912a27
---
# Quickstart
> Get up and running on the latest version of HubSpot's developer platform.
export const MinimumCliVersion = () =>
The latest version of the HubSpot CLI, which is recommended, is 8.8.0. You can check which version of the CLI you have installed by running hs --version.
;
export const ChromeLocalhostWarning = () =>
As of Google Chrome version 142, you will receive a one-time popup asking for app.hubspot.com to access devices on your local network. Select Accept to enable local development for your apps.
You can also manage this setting in your Chrome settings by navigating to Settings > Privacy & Security > app.hubspot.com > Permissions > Local network access.
;
Get started with app development by building and deploying a simple boilerplate app.
If you don't have a HubSpot account yet, [create an account](https://app.hubspot.com/signup-hubspot/crm?intent=developer) before proceeding with the steps below.
## Set up your local environment
Before getting started, install the latest version of the [HubSpot CLI](/docs/developer-tooling/local-development/hubspot-cli/install-the-cli). In a terminal window, run the following command:
```shell theme={null}
npm install -g @hubspot/cli
```
After installing the latest version of the HubSpot CLI, it's recommended you run `hs account auth` to authenticate your HubSpot account:
* Follow the prompts to generate a Personal Access Key in your account. Your personal access key will then be passed to the terminal.
* In the terminal, you'll then be asked whether you want to set the account as your default. Setting an account as default means CLI commands will automatically target it without needing the `--account` flag. You can change your default at any time with the [`hs account use` command](/docs/developer-tooling/local-development/hubspot-cli/commands/account-commands#set-default-account).
## Create and upload a project
With the CLI installed, run `hs get-started` to initialize your project.
```shell theme={null}
hs get-started
```
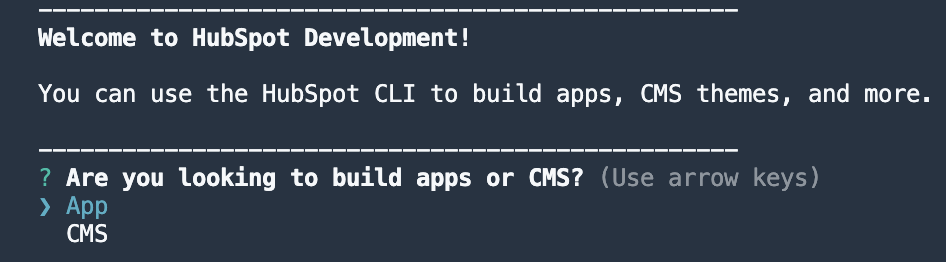
You'll be greeted with a welcome message, then you can begin setting up your project and app.
* Following the prompts, select **App**.
* Give your project a **name**.
* Set your project's **local directory** (by default this will be your current working directory).
* Upload your project to HubSpot to initialize the first build and deploy.
## Install the app and set up the card
After your project builds and deploys, you'll be prompted to navigate to your HubSpot account to walk through installing and previewing your app.
* In the terminal, press **Enter** to confirm that you want to install the app in your account. A browser window will open to the app installation page.
The "unverified app" warning on the installation page is expected. Apps that haven't been submitted to and reviewed through HubSpot's app marketplace verification process display this warning to protect users from installing apps from unknown developers. Since this is an app you built, it's safe to proceed.
* Select the **checkbox** to confirm that you want to install the app, then click **Connect App**.
* On the installation success page, click **Continue to manage App Card view**.
You'll then be redirected to the app card settings page, where you'll walk through configuring the card's display location.
* Click **Manage locations**.
* In the right sidebar, select the **checkbox** next to *Get Started App Card* to add the card to the middle column of the default contact record view.
* Click **Save** to save your changes and close the sidebar.
* In the *Get Started App Card* section, click **Complete card setup** to finish the walkthrough.
## Run the local development server
With the app installed and card location set, use the command below to switch back to the terminal to navigate into your project directory and start the local development server (`hs project dev`). The development server command will automatically check for dependencies and install them as needed.
```shell theme={null}
cd your-project-name
hs project dev
```
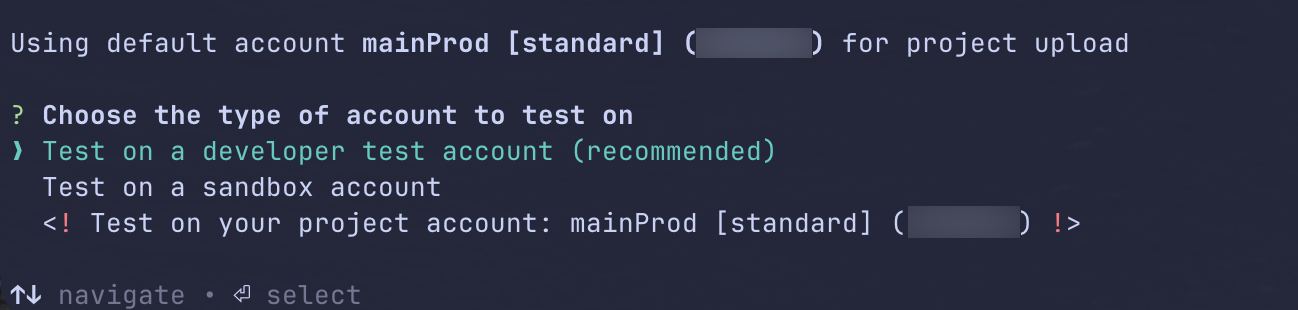
When prompted, select the account you want to use for the testing session. You can select an account you've already connected to the CLI, or create a new test or sandbox account by following the additional prompts. Learn more about [the different account types](/docs/getting-started/account-types).
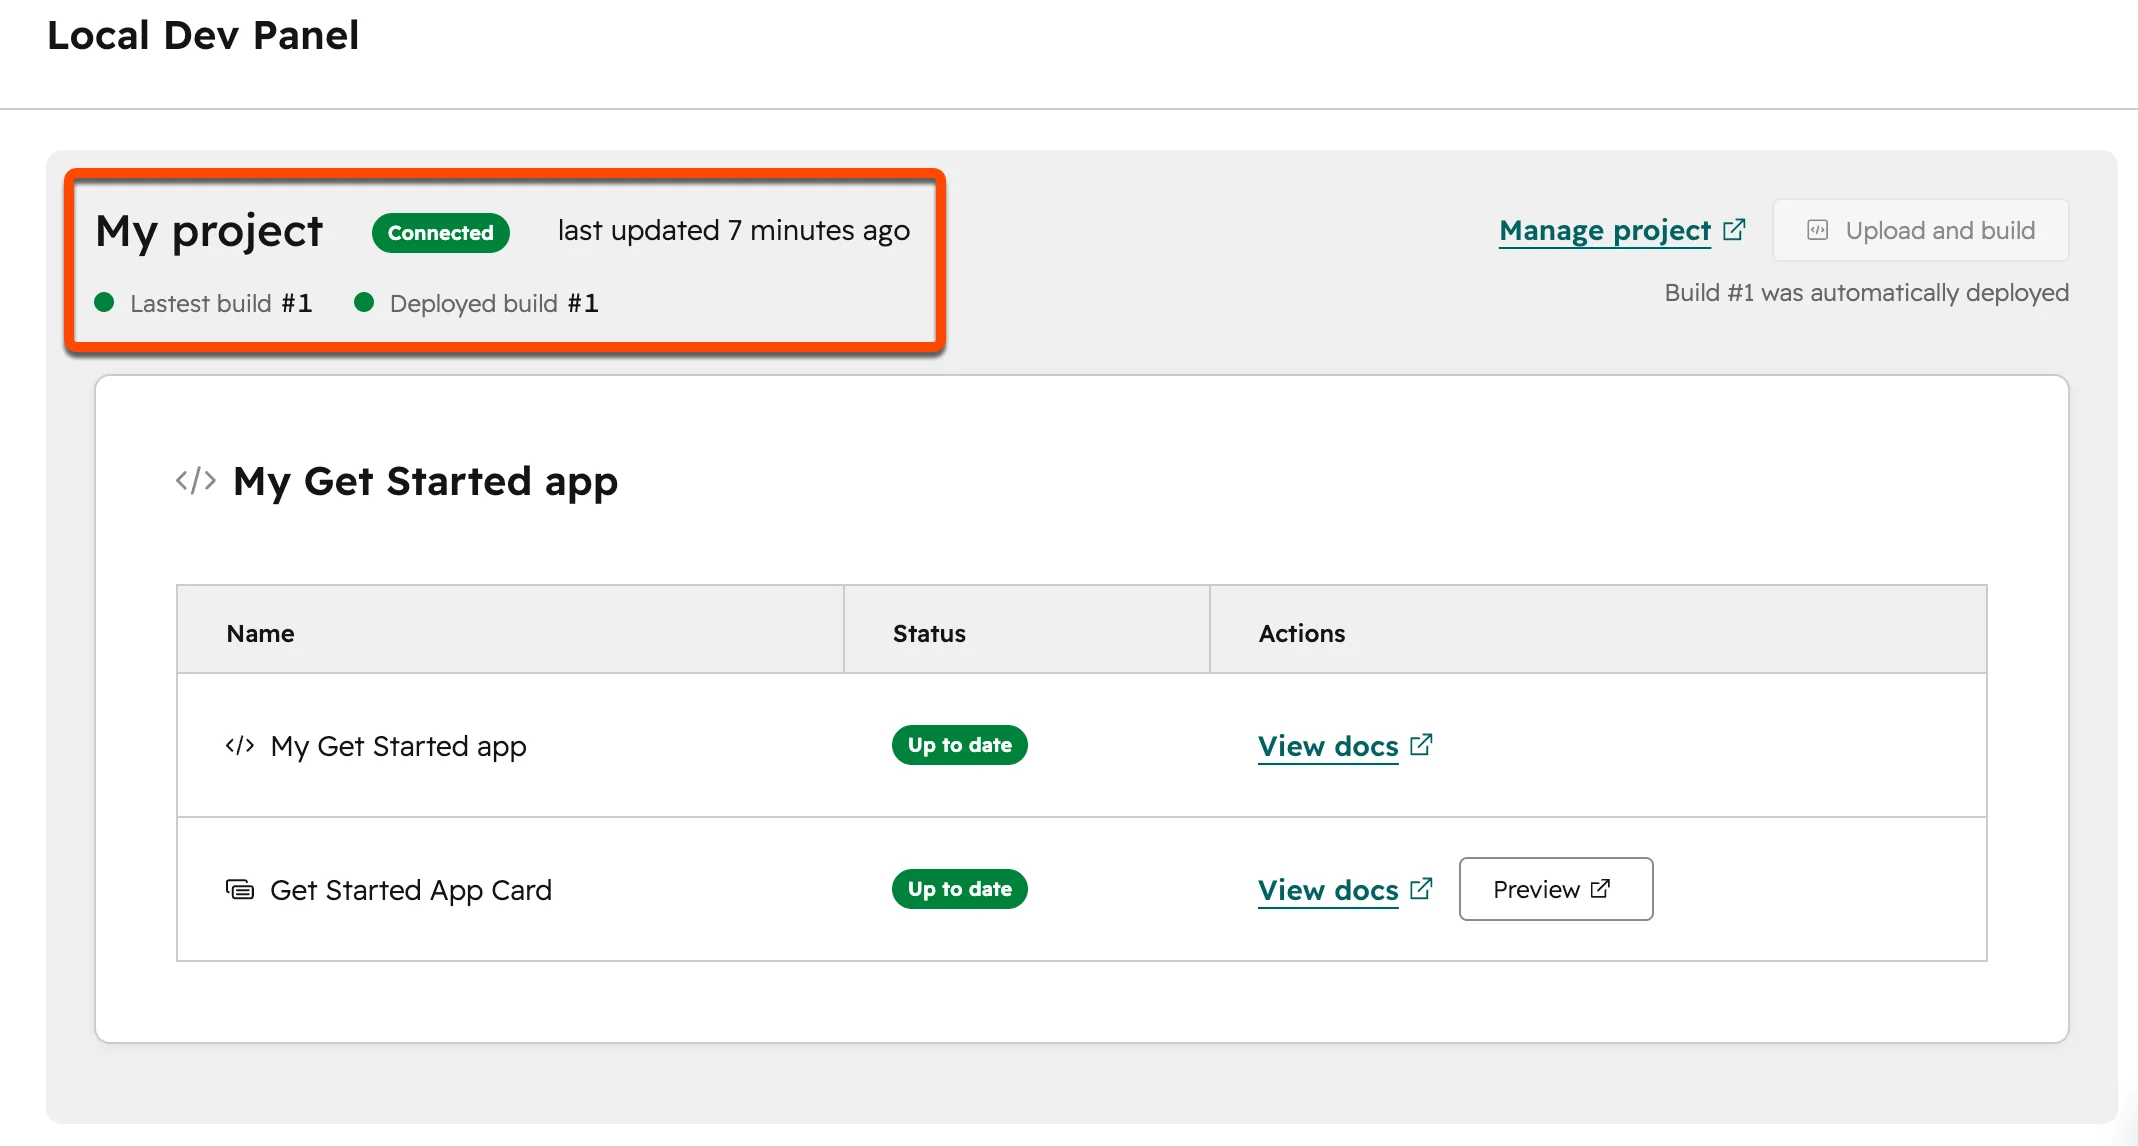
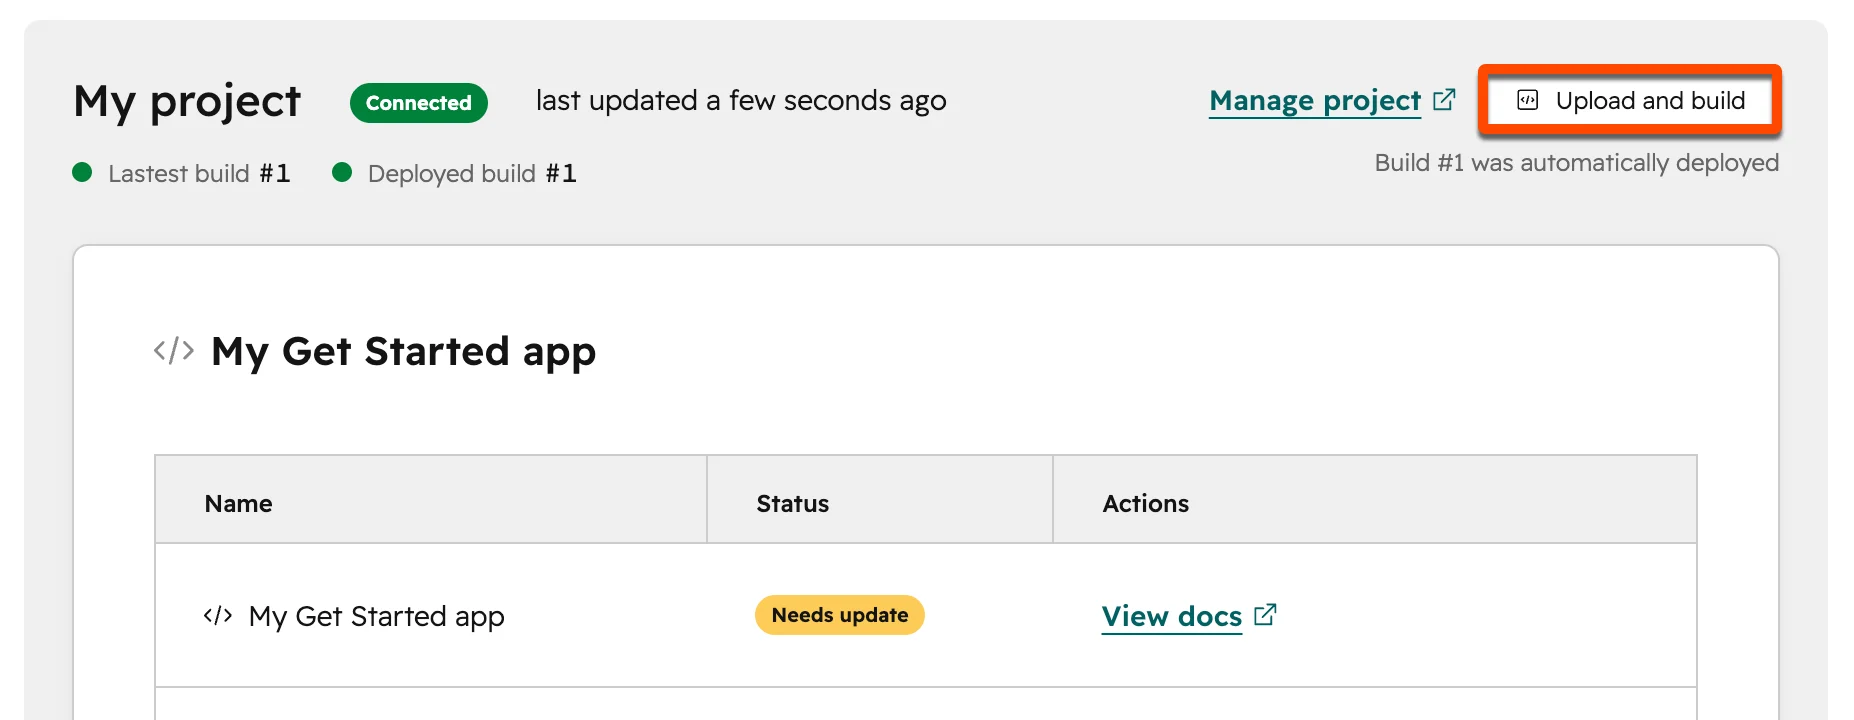
Once the local development server starts, a browser window will open to the *Local Dev Panel* page in HubSpot. Along with the actions you can perform on this page, it also displays high-level information about the project, such as the number of the latest build and deployed build. The *last updated* time will update any time you make a change to your local project files.
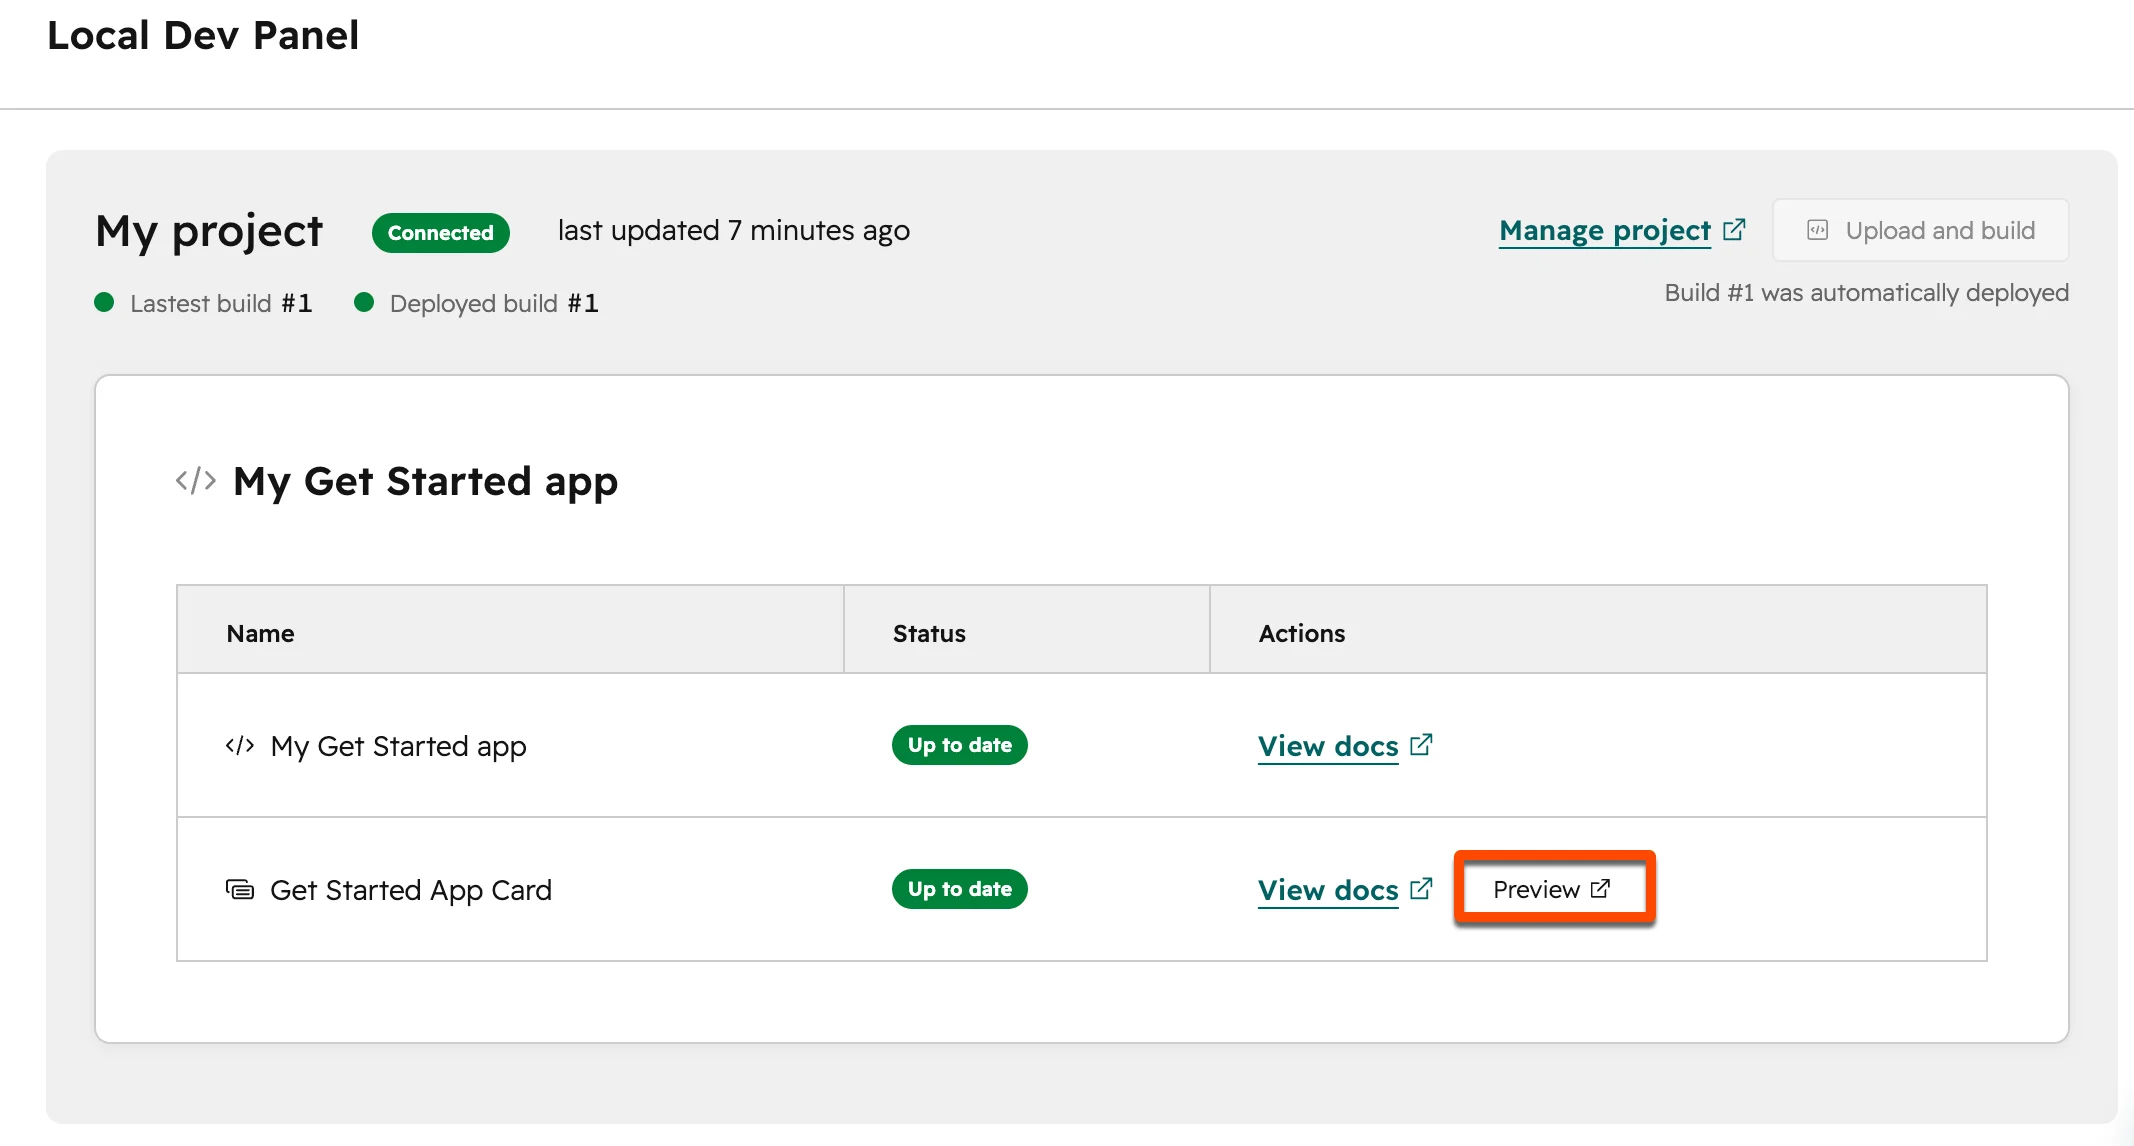
* Click **Preview** next to *Get Started App Card*.
* On the contacts index page, click the **name** of a contact.
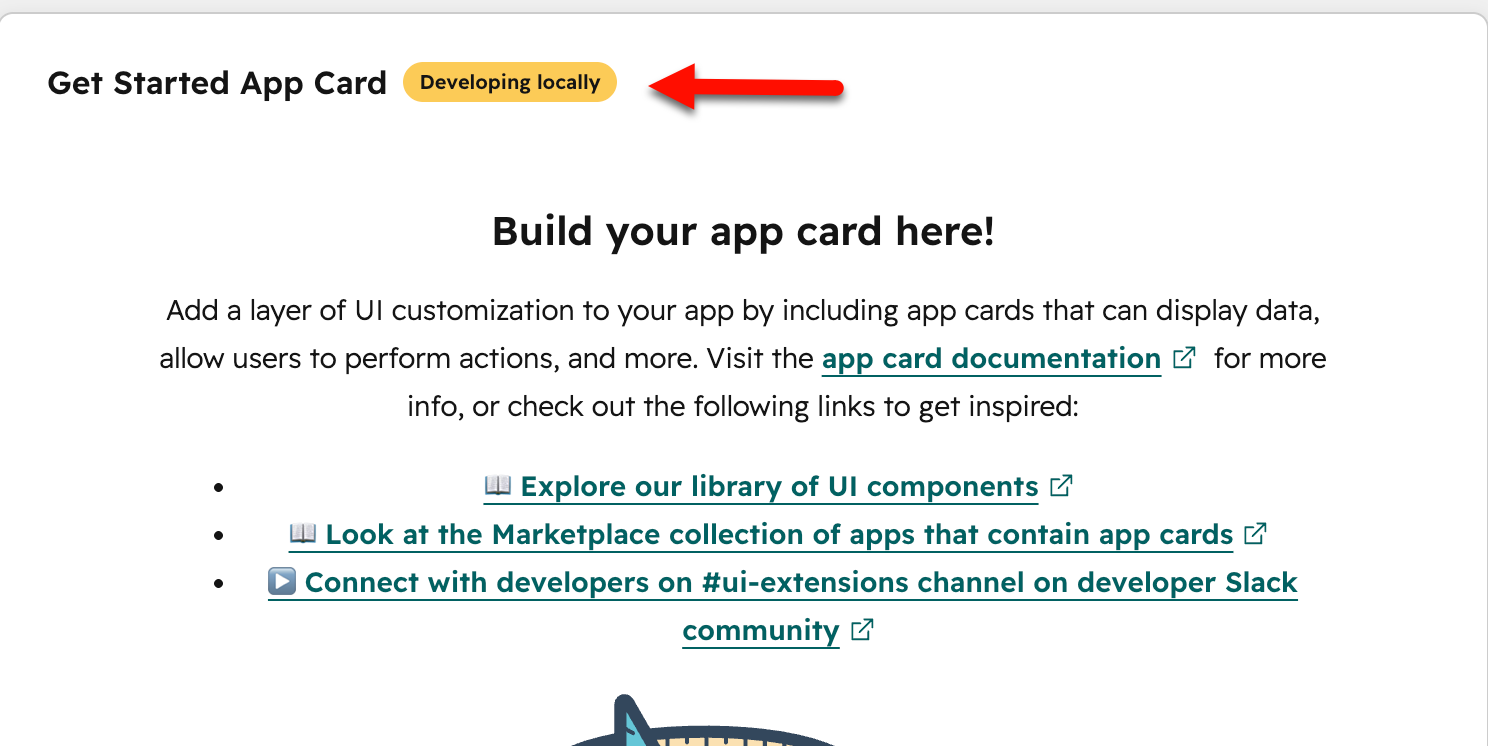
* In the middle column, scroll down in the *Overview* tab to see your app card. A *Developing locally* badge will display next to the app card name. This badge is only visible to you while the development server is running.
The local development server will automatically pick up any changes you make to frontend React/TypeScript files (e.g., `get-started-app-card.tsx`). Any changes made to other file types, such as `.json` configuration files, will need to be uploaded to HubSpot before they can be picked up. You can either do this by running the `hs project upload` command in the terminal, or by clicking the **Upload and build** button on the *Local Dev Panel* page.
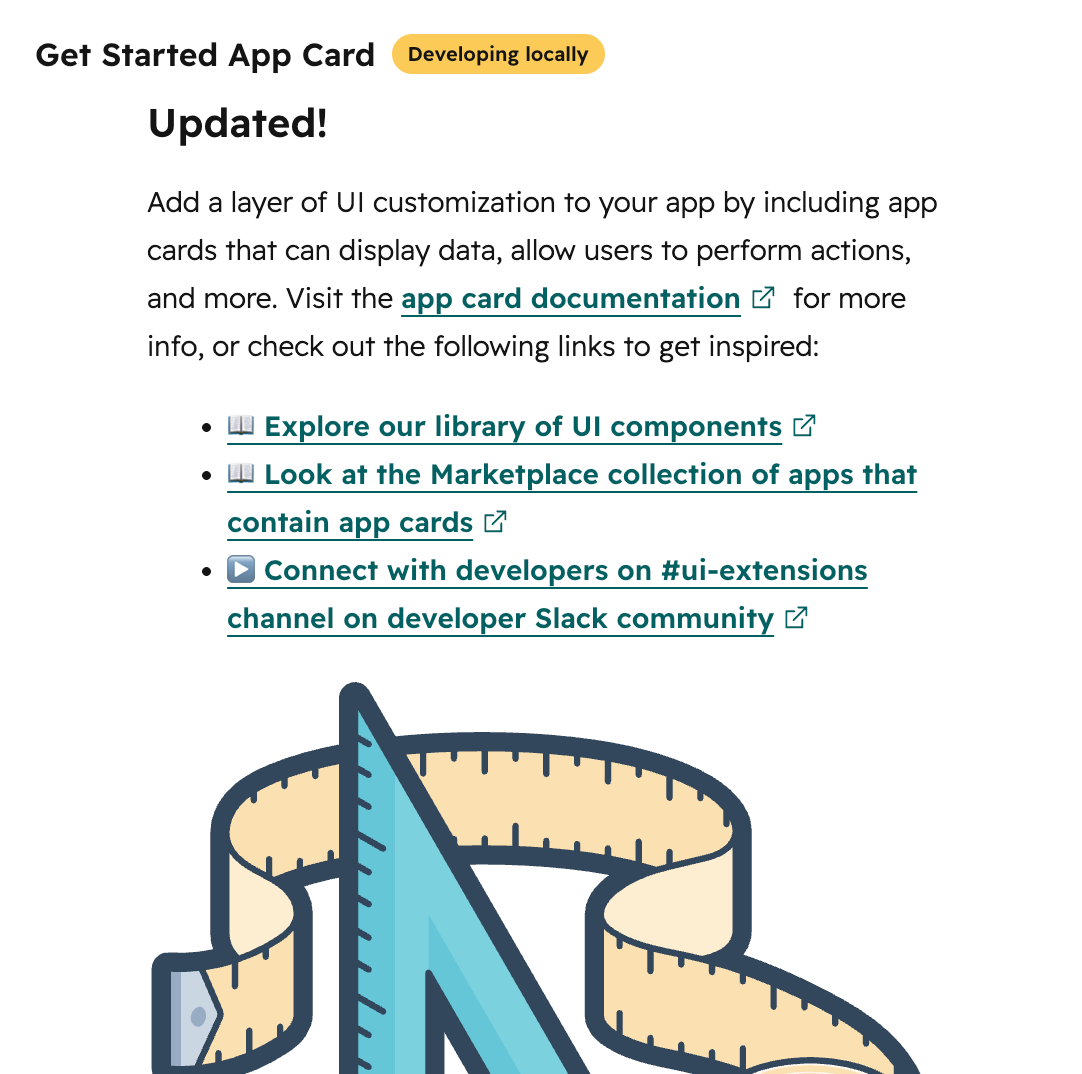
To test this out, make a change to the app card's `.tsx` file, then save your change. For example, the code block below includes changes to the `EmptyState` component's title text, layout, and spacing.
```tsx highlight={27-29} theme={null}
import {
CrmContext,
EmptyState,
ExtensionPointApiActions,
Link,
List,
Text,
} from '@hubspot/ui-extensions';
import { hubspot } from '@hubspot/ui-extensions';
interface ExtensionProps {
context: CrmContext;
actions: ExtensionPointApiActions<'crm.record.tab'>;
}
hubspot.extend<'crm.record.tab'>(({ context, actions }: ExtensionProps) => (
));
const Extension = ({ context, actions }: ExtensionProps) => {
const appCardDocsLink =
'https://developers.hubspot.com/docs/apps/developer-platform/add-features/ui-extensibility/app-cards/overview';
return (
<>
Add a layer of UI customization to your app by including app cards
that can display data, allow users to perform actions, and more. Visit
the app card documentation for
more info, or check out the following links to get inspired:
📖 Explore our library of UI components
📖 Look at the Marketplace collection of apps that contain app cards
▶️ Connect with developers on #ui-extensions channel on developer
Slack community
);
};
```
You can learn more about each of the components used in the quickstart app card, including usage examples and available parameters, in the docs below:
* [EmptyState](/docs/apps/developer-platform/add-features/ui-extensions/ui-components/standard-components/empty-state)
* [Text](/docs/apps/developer-platform/add-features/ui-extensions/ui-components/standard-components/text)
* [List](/docs/apps/developer-platform/add-features/ui-extensions/ui-components/standard-components/list)
* [Link](/docs/apps/developer-platform/add-features/ui-extensions/ui-components/standard-components/link)
## Next steps
Now that you've successfully deployed your quickstart app, check out the following resources to continue building on HubSpot's developer platform:
* [App configuration](/docs/apps/developer-platform/build-apps/app-configuration)
* [Manage apps in HubSpot](/docs/apps/developer-platform/build-apps/manage-apps-in-hubspot)
* [Create app cards](/docs/apps/developer-platform/add-features/ui-extensions/extension-points/app-cards/create-an-app-card)
* [Fetching data for UI extensions](/docs/apps/developer-platform/add-features/ui-extensions/fetching-data)
* [UI extension components](/docs/apps/developer-platform/add-features/ui-extensions/ui-components/overview)
 * Give your project a **name**.
* Set your project's **local directory** (by default this will be your current working directory).
* Upload your project to HubSpot to initialize the first build and deploy.
* Give your project a **name**.
* Set your project's **local directory** (by default this will be your current working directory).
* Upload your project to HubSpot to initialize the first build and deploy.

 * On the contacts index page, click the **name** of a contact.
* In the middle column, scroll down in the *Overview* tab to see your app card. A *Developing locally* badge will display next to the app card name. This badge is only visible to you while the development server is running.
* On the contacts index page, click the **name** of a contact.
* In the middle column, scroll down in the *Overview* tab to see your app card. A *Developing locally* badge will display next to the app card name. This badge is only visible to you while the development server is running.
 To test this out, make a change to the app card's `.tsx` file, then save your change. For example, the code block below includes changes to the `EmptyState` component's title text, layout, and spacing.
 ```tsx highlight={27-29} theme={null}
import {
CrmContext,
EmptyState,
ExtensionPointApiActions,
Link,
List,
Text,
} from '@hubspot/ui-extensions';
import { hubspot } from '@hubspot/ui-extensions';
interface ExtensionProps {
context: CrmContext;
actions: ExtensionPointApiActions<'crm.record.tab'>;
}
hubspot.extend<'crm.record.tab'>(({ context, actions }: ExtensionProps) => (
```tsx highlight={27-29} theme={null}
import {
CrmContext,
EmptyState,
ExtensionPointApiActions,
Link,
List,
Text,
} from '@hubspot/ui-extensions';
import { hubspot } from '@hubspot/ui-extensions';
interface ExtensionProps {
context: CrmContext;
actions: ExtensionPointApiActions<'crm.record.tab'>;
}
hubspot.extend<'crm.record.tab'>(({ context, actions }: ExtensionProps) => (